

Step 1 – Installing EMP365
A step-by-step guide
EMP365 is a cloud-based Growth Engine 📈 for Nimble Organizations, powered by Microsoft solutions. Its main user interface is available in MS Teams.
This is a step-by-step guide to help you get started with EMP365.
Prerequisites: Your organization must be using cloud-based O365. On-premise Office cannot be integrated into EMP365.
The installation consists of 3 steps:
- In Your Azure Active Directory (AD), grant access to EMP365
- Forward access credentials to EMP365 administrator so that he/she could register your account
- In MS Teams, each user must install EMP365 application
Once these steps are done, your organization is ready to use EMP365.
Granting Access to EMP365 in AD
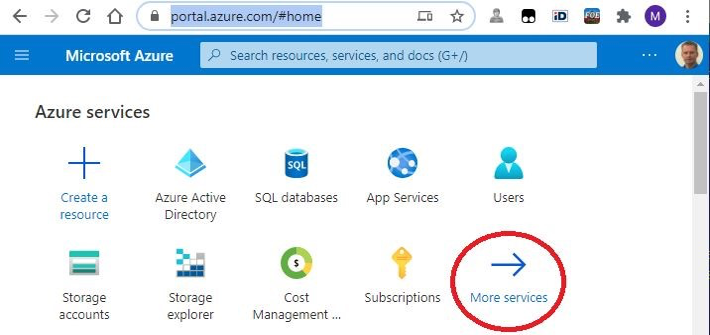
- Open https://portal.azure.com
- Log in if not logged in yet
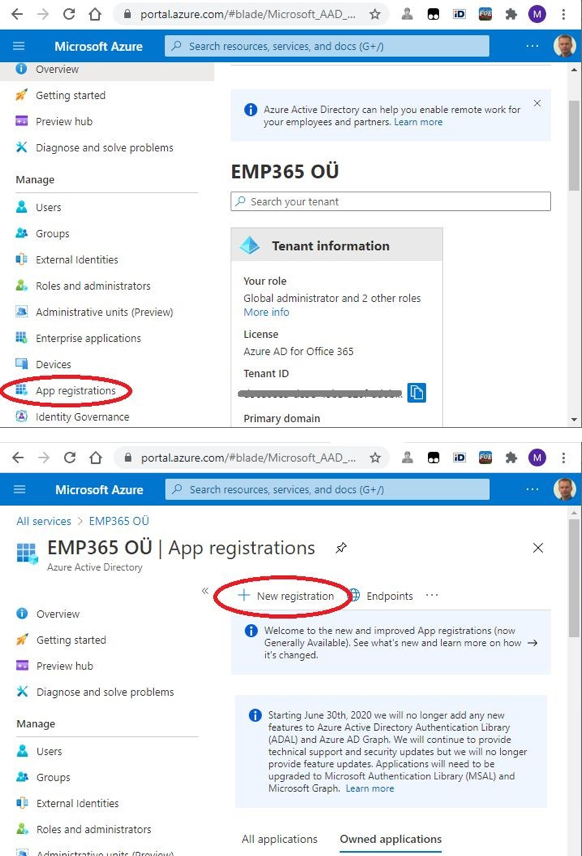
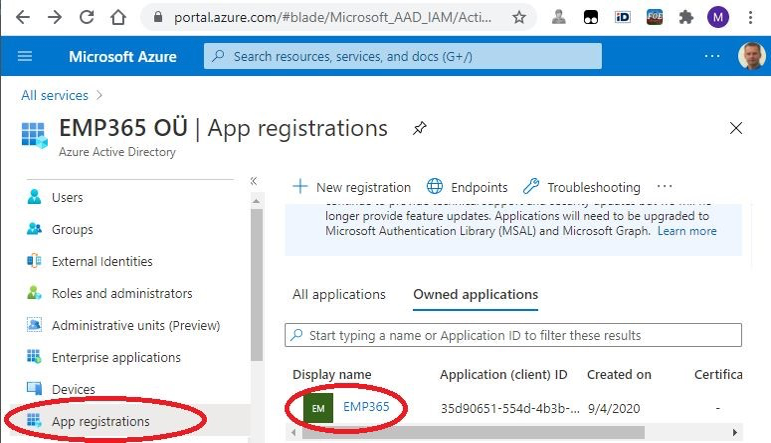
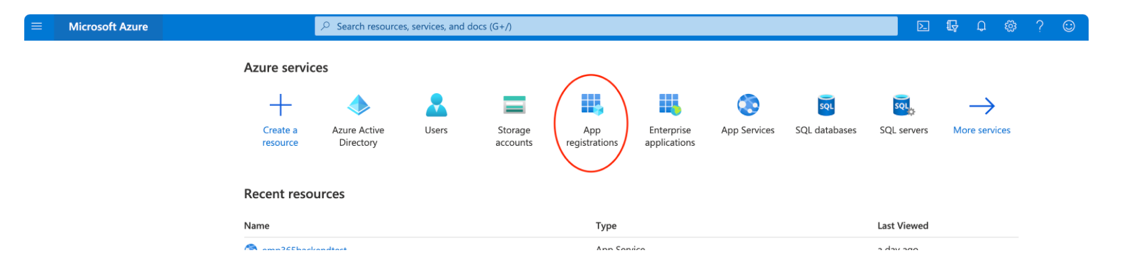
- Navigate to Azure Active Directory → App registrations → New Registration


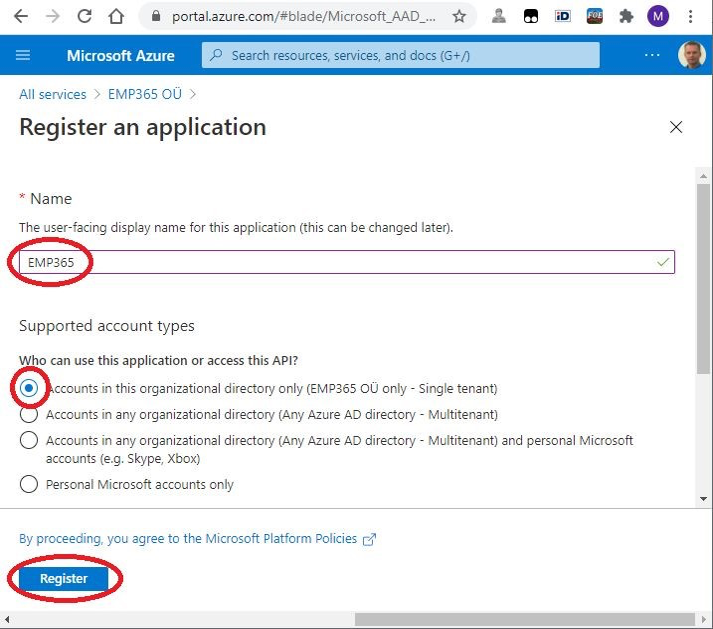
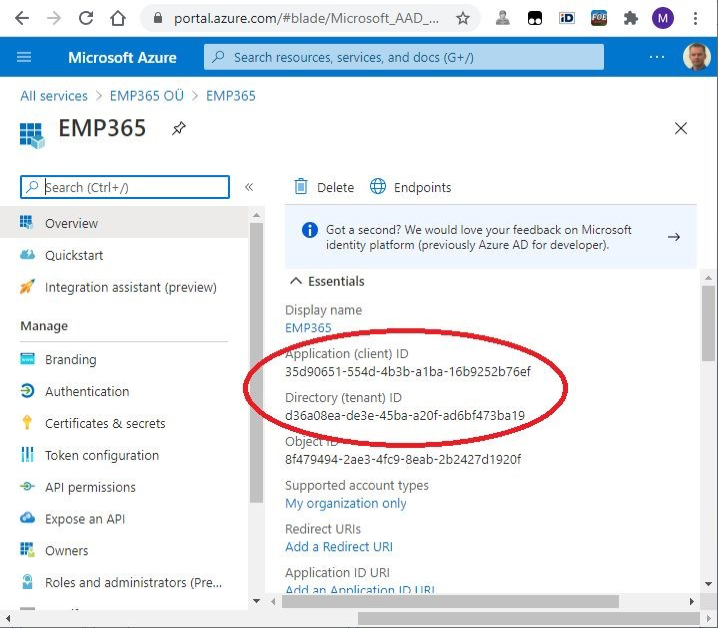
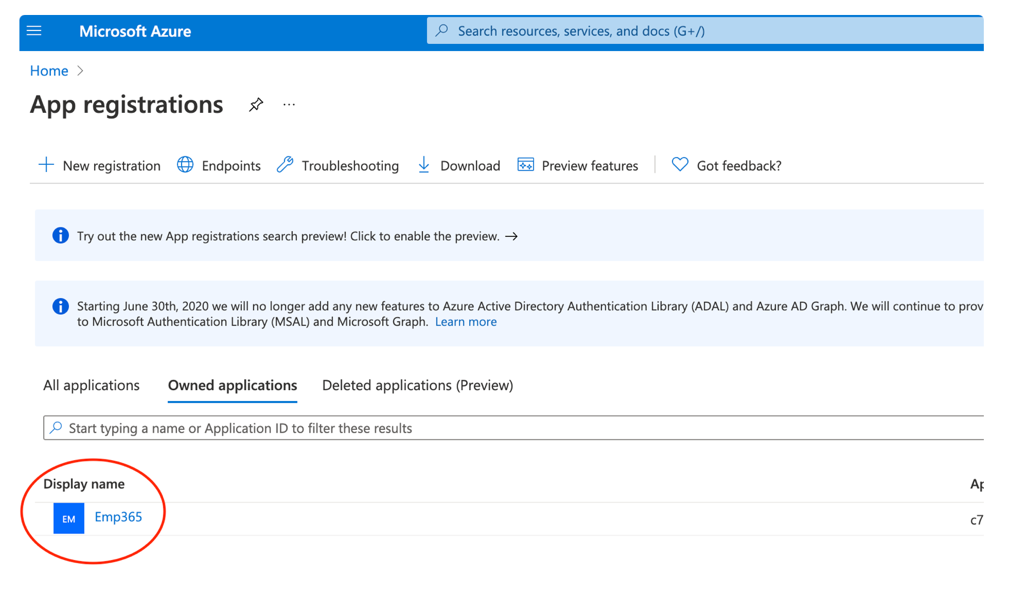
4. Enter registration details (Name: EMP365, access type: single-tenant) and click on “Register”. After successful registration, copy client ID & tenant ID from the overview page in order to send these to EMP365 admin.
- Navigate to App registrations → EMP365 → Certificates & secrets → New client secret
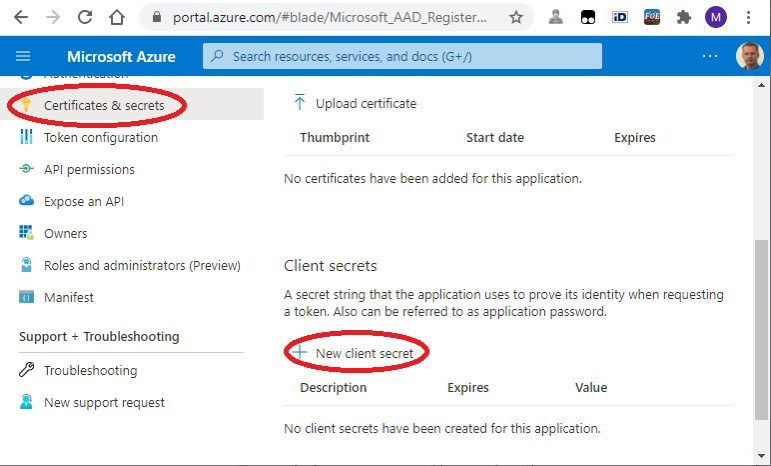
- Enter secret details (Name: EMP365 secret, Never expires). Click on “Add”. A new secret is created. Now, copy the entire secret value in order to send it to the EMP365 admin
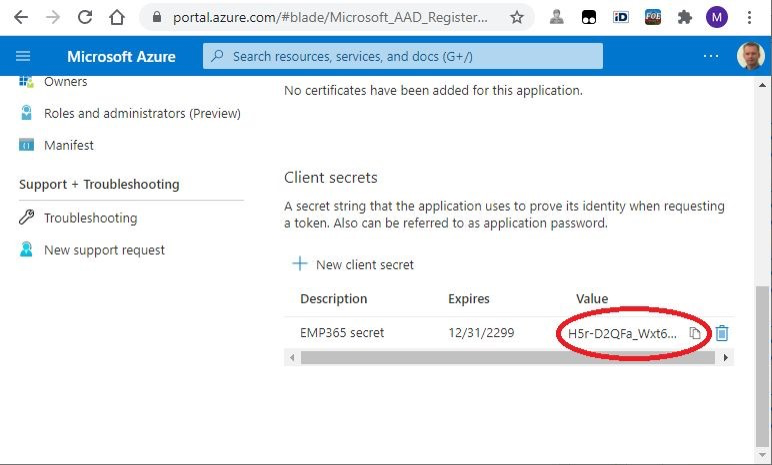
- Send client ID, tenant ID and the secret value to EMP365 admin and continue immediately with the next steps 📩
Email: support@emp365.net
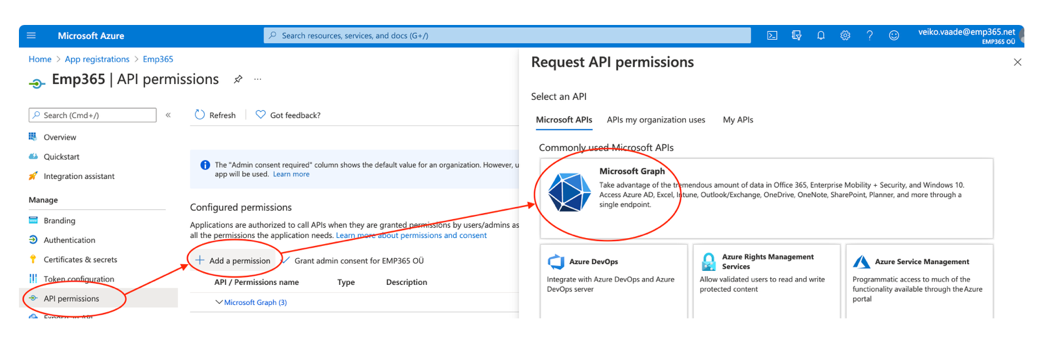
- Navigate to App registrations | EMP365 | API permissions. Click to „Add a permission“ and then „Microsoft Graph“
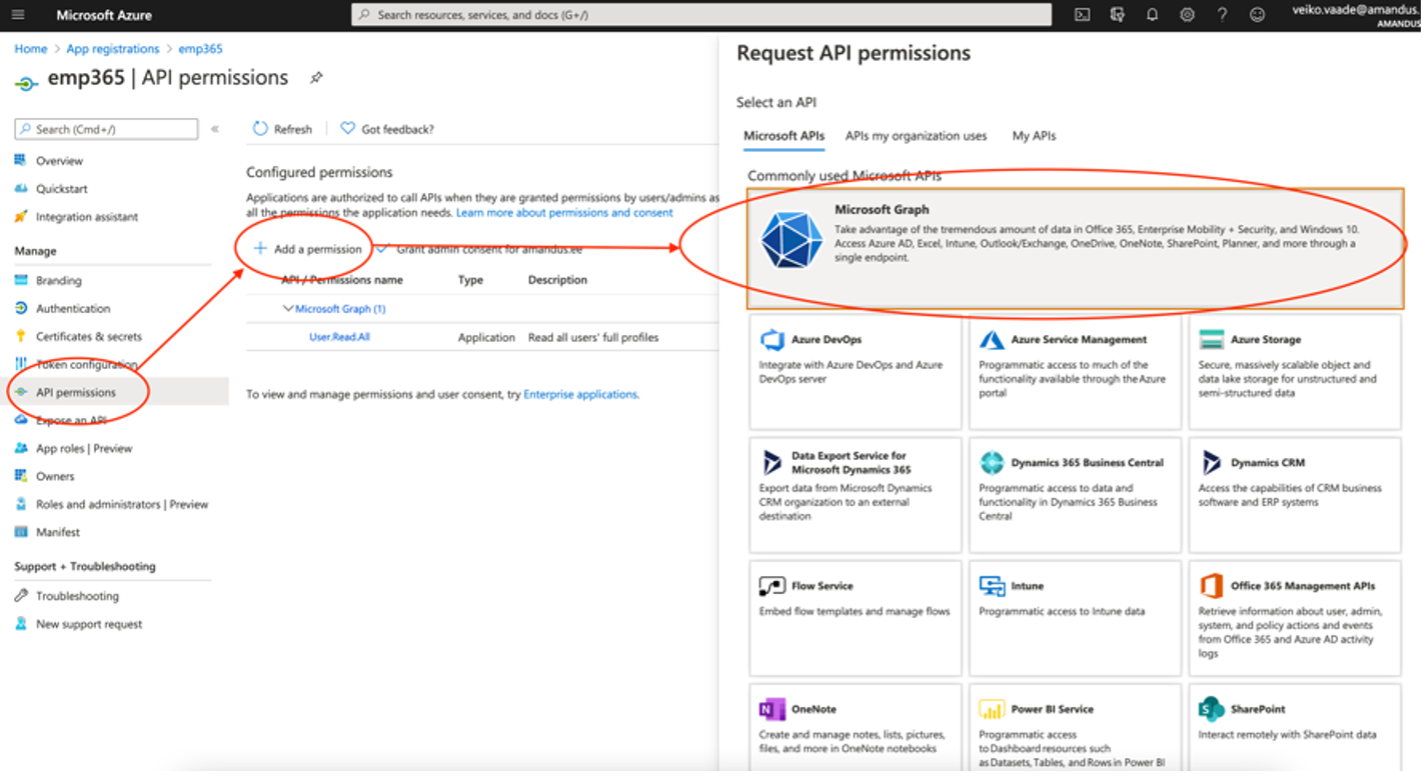
- Click to „Application permissions“, insert into filter textarea „User.Read“ and choose „User.Read.All“ .
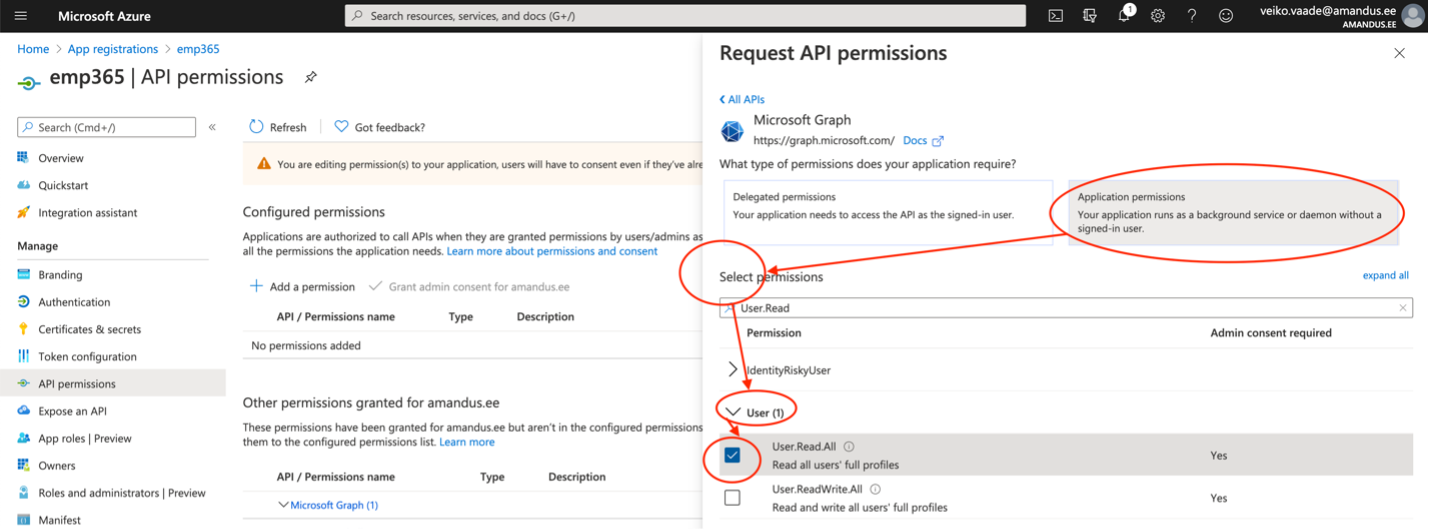
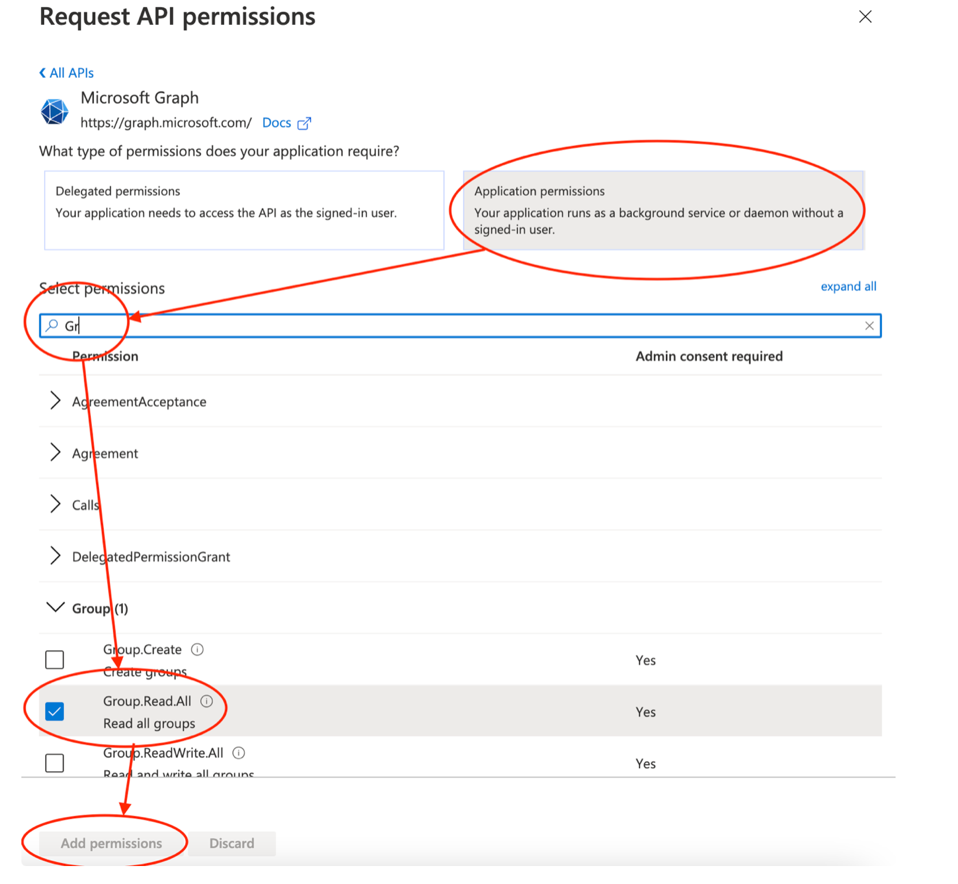
- Insert into filter area “group” and choose “Group.Read.All” and click to “Add permissions”
- Insert into filter area “calendar” and choose “Calendars.ReadWrite” and click to “Add permissions”
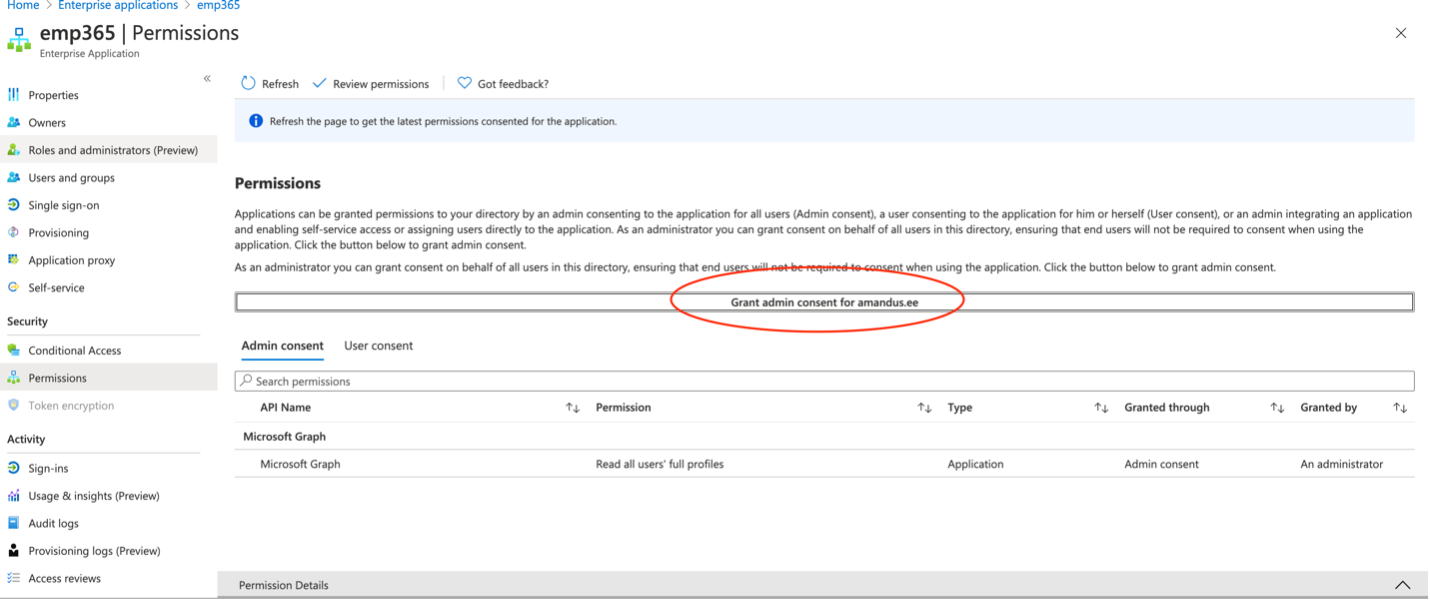
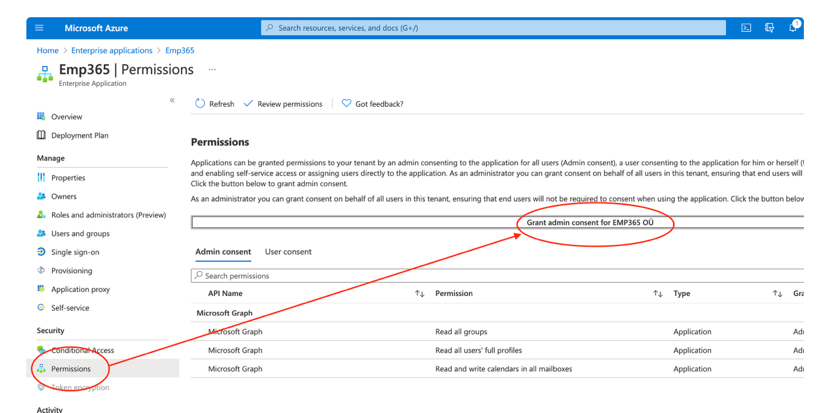
- Navigate to Enterprise applications | EMP365 | Permissions. Click to „Grant admin consent for your company“. Click Accept on the permissions review window.
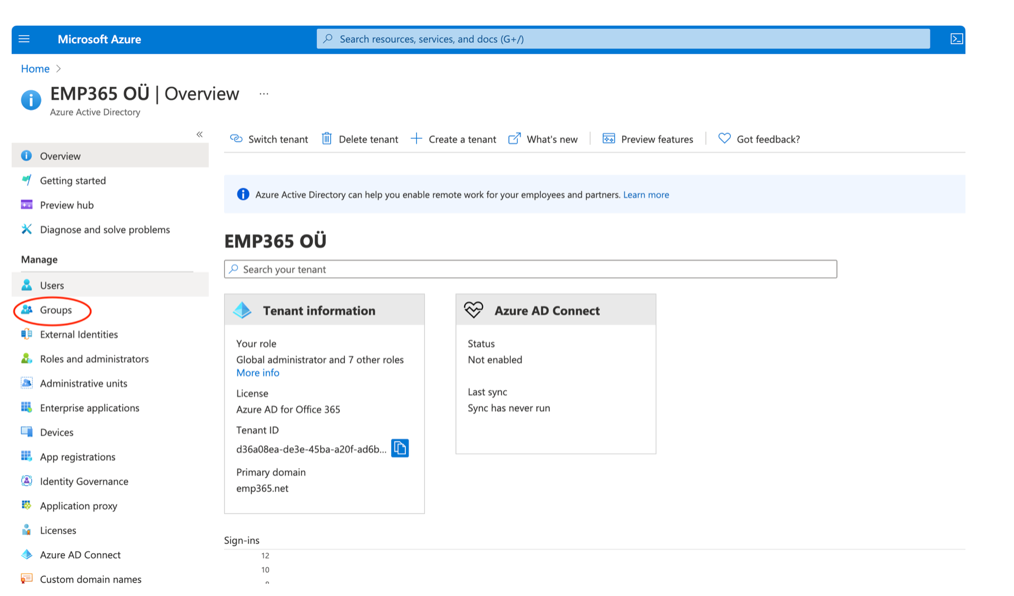
- Navigate to Groups.
- Click + New group
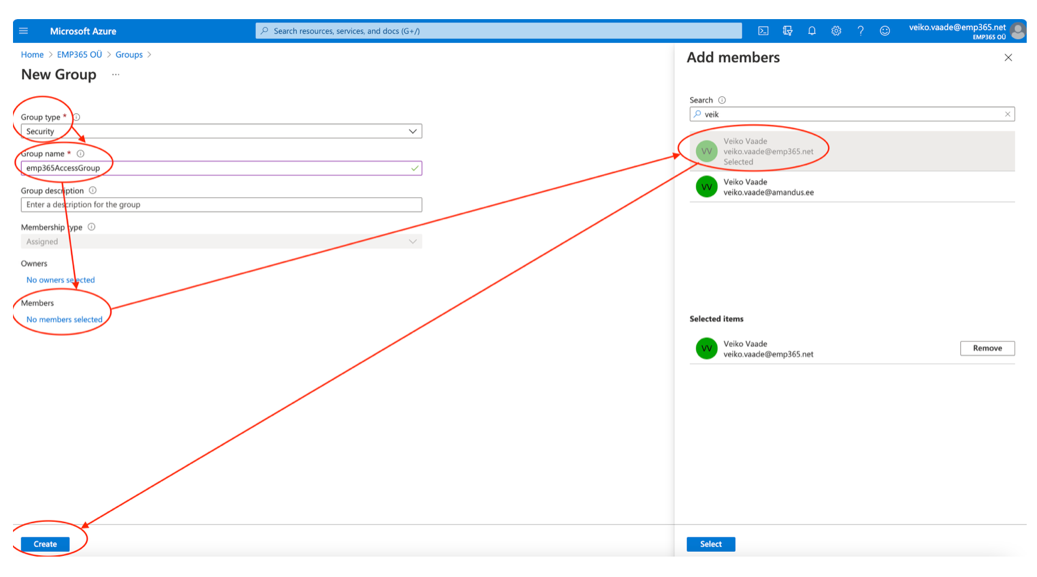
- Insert EMP365 into Group name textbox, click to members, select the persons who will use Emp365 application and click Select to add the selected persons into the group. Click to Create
- Now you need to wait for EMP365 admin to activate your account. You will receive the email from our support team after the account is added.
Step 2 – Load EMP365 app into MS Teams environment (MS Teams administrator)
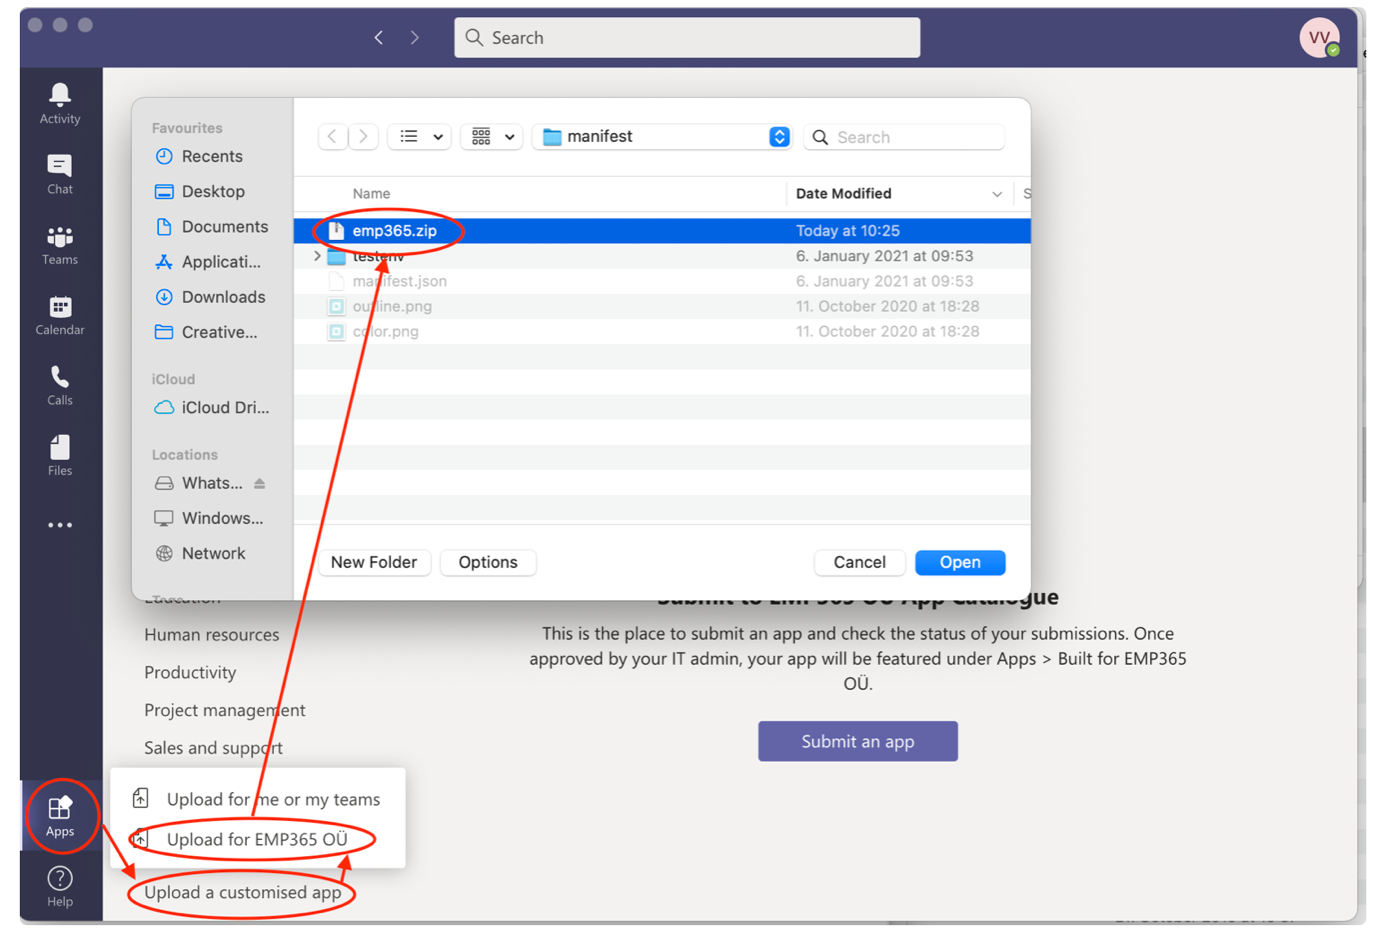
- Download emp365.zip from https://emp365.net/emp365.zip
- Open Teams App in your computer and click Apps, then click Upload a customised app and choose emp365.zip
Step 3 – Installing EMP365 in MS Teams (Emp365 users)
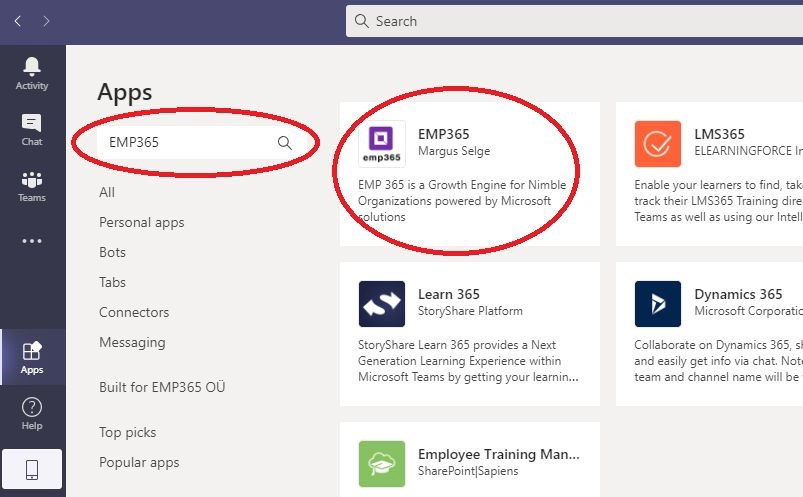
- Once EMP365 has registered your organization account in the cloud, each user in your organization must install EMP365 in his/her own MS Teams: click on … on the left-side pane and select More Apps.
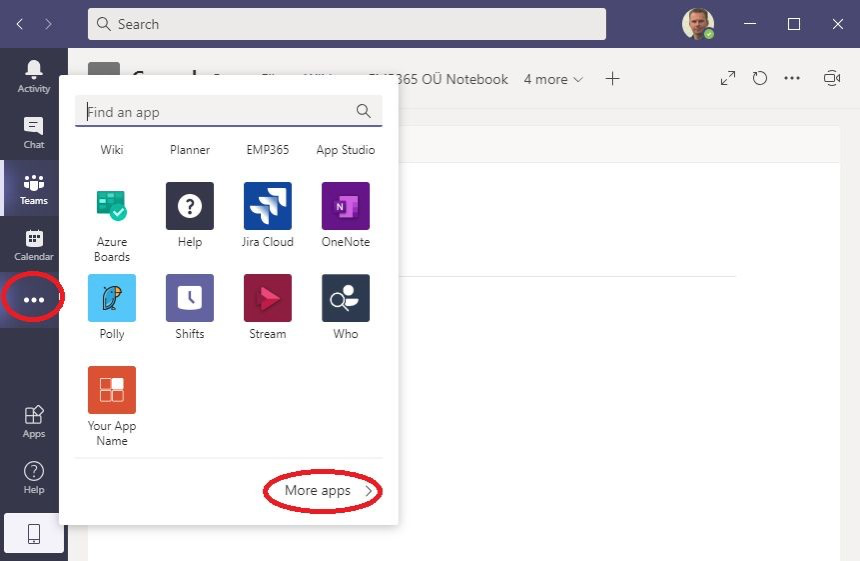
2. Find the EMP365 app, by typing EMP365 in the search box and then clicking on the EMP365 tile on the right-side pane. Click “Add” to start the installation.

3. Start EMP365, by clicking … on the left pane and then locating the app, by typing “EMP365” in the find app box.
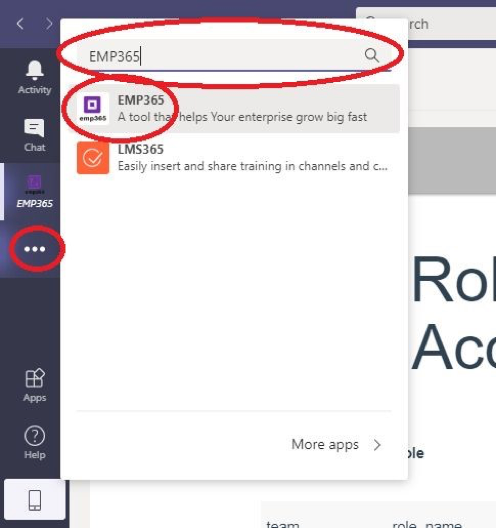
You are now ready to enjoy EMP365!
Step 4 (Deprecated) – Use AD group users instead of all users in Azure
1. Choose Azure Active Directory from portal.azure.com
2. Choose Groups from Azure Active Directory
 3. Choose New Group
4. Select Security as Group type , type group name, add members to group and click to create. Send typed group name to your Emp365 contact person
5. Go to App registrations in the Azure portal.
6. Choose Emp365 from App registrations
7. Click API Permissions -> Add a permission -> Microsoft Graph
8. Choose Application permissions , then insert letters G and r to find textarea, choose Group.Read.All permission and finally click to Add permissions button
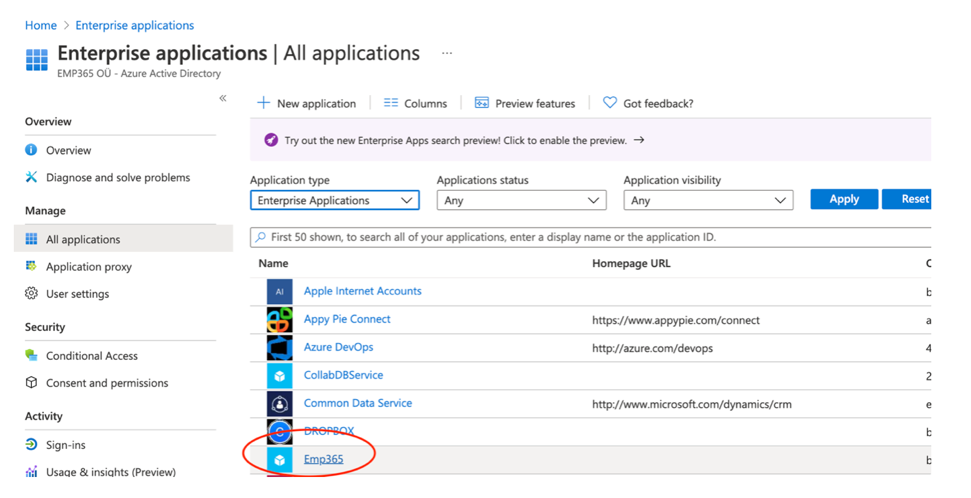
9. Go to Enterprise Applications
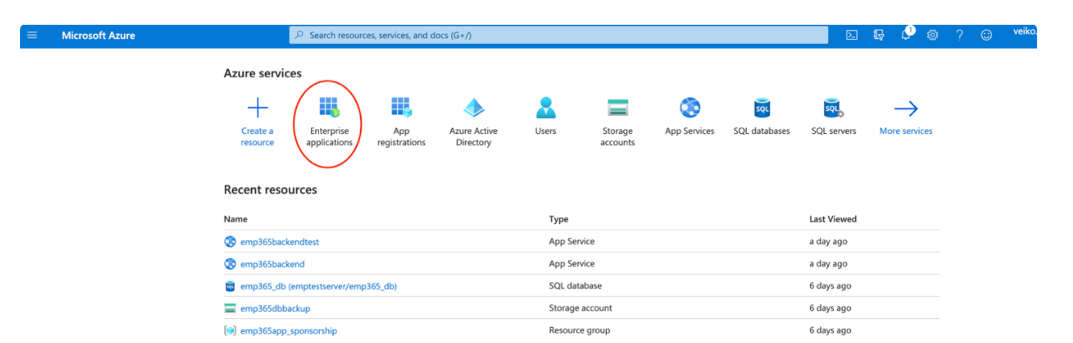
10. Choose Emp365
11. Click to Permissions and then to Grant admin consent to EMP365 OÜ
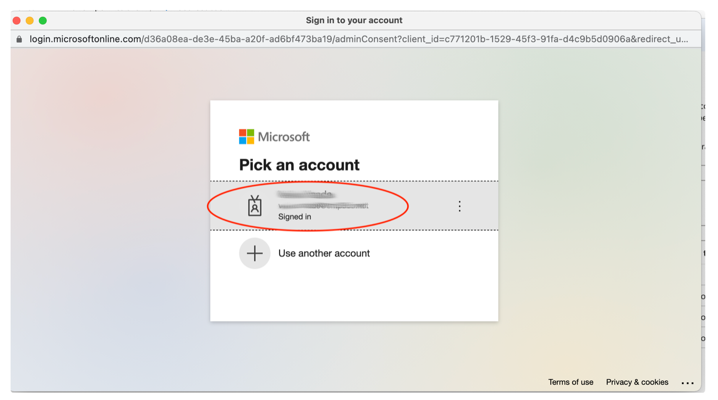
12. Choose your user when asked
13. Click Accept to accept the permissions request
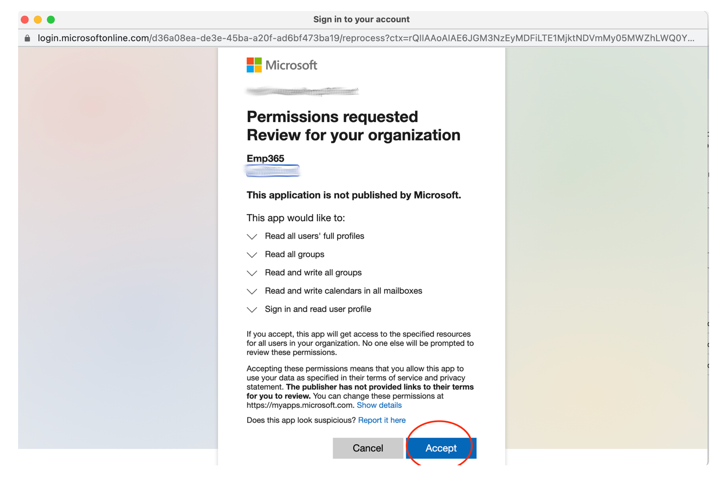
15 minutes after the settings change by Emp365 administrator the employee list will be renewed.